I Built My First PC and This is How it Went

Even as a child I’ve always been a bit of a tinkerer when it came to electronics; I enjoyed seeing what was inside. Looking at that green board with gold lines laced with wires and nodes intrigued my brain as a child and I wanted to understand how it all worked. My parents quickly left me to my own devices when they observed me take a screwdriver, at 4-years-old, to an electronic robot learning toy.

Now that I think about it, taking apart and then reassembling my “Electronic Talking Learning Friend” may have been a tad dark.
“Don’t come crying to me when you’ve broken your toy, we won’t get you a new one.” My mother warned with concern in her voice.
I, however, successfully pulled that entire toy apart, reassembled it, flipped the switch to on, and was greeted with the satisfying bleeps and chimes of early 90’s learning electronics. This obviously continued throughout my life with game consoles, TVs, controllers, laptops, and of course computers. I think electronics look cool, and it might be part of why my favorite looking console ever is the Jungle Green Nintendo 64 I had when I was twelve. Being able to see those boards and wires through the transparent plastic, showing off what the console was on the inside, was just so cool.
So knowing all that, it is probably surprising that at 30-years-old, I finally built my first PC. It’s not that I didn’t want to. It mostly comes down to the fact I’ve never needed to. Throughout my life, I’ve always just used what was around me: the family computers, a college laptop, a pre-built desktop (also for college), and a friend’s used PC he had built that I bought off of him. The last of which lasted me eight years and that machine is twelve years old at the time of me building my new machine. Additionally, most of my experience with electronics stems from disassembling already built devices. While I may have a lot of experience with taking things apart, that doesn’t necessarily mean I ever learned what it was I was actually looking at.
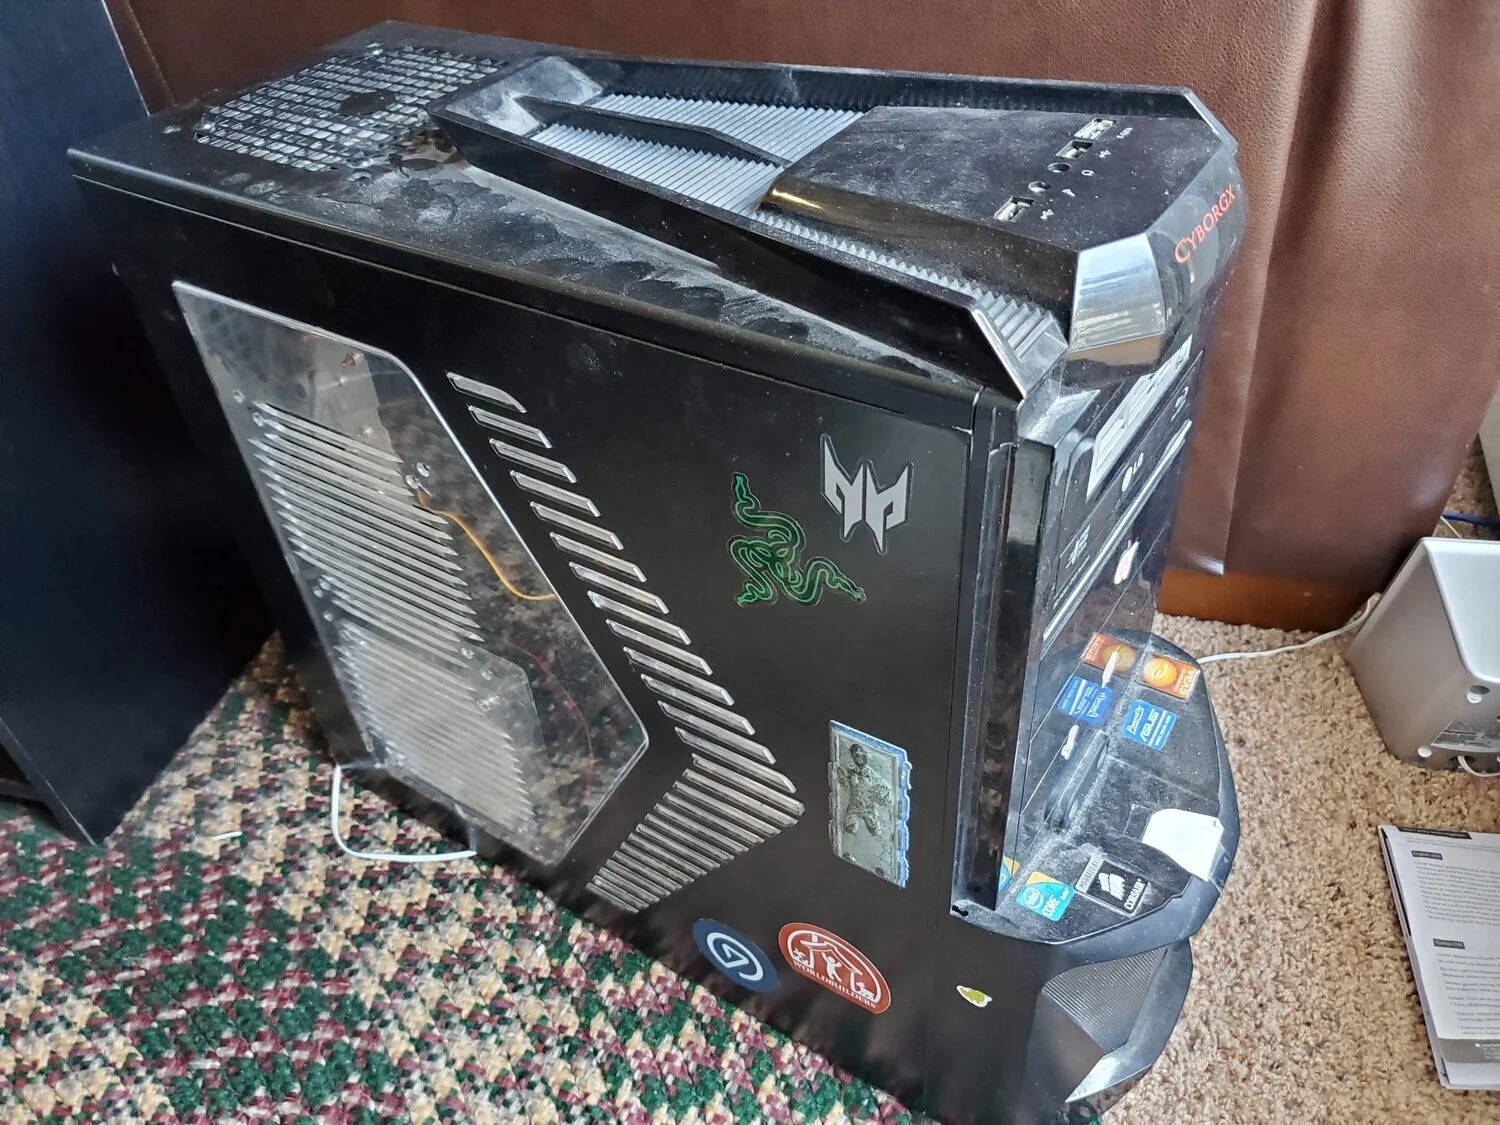
Goodbye old friend, you did well
Buying a used custom build is probably one of the best things that helped prepare me for my first build. A PC doesn’t usually last 12 years without a few upgrades in there, especially when it gets used heavily for video editing, animation, and of course gaming. The upgrades over the years helped me learn what the various pieces were, what things were called, and most importantly how to safely remove and install components. It taught me about drivers, voltage, and speeds. By the time I built my own, just about the only thing I hadn’t done was a CPU install, which is often considered the hairiest most nerve-wracking part of building your own PC.
So here I am, having built my own PC for the first time, and feeling proud of the fact that after everything was assembled I only have to move one stick of RAM to have it boot up correctly. What did I learn?
A ton.
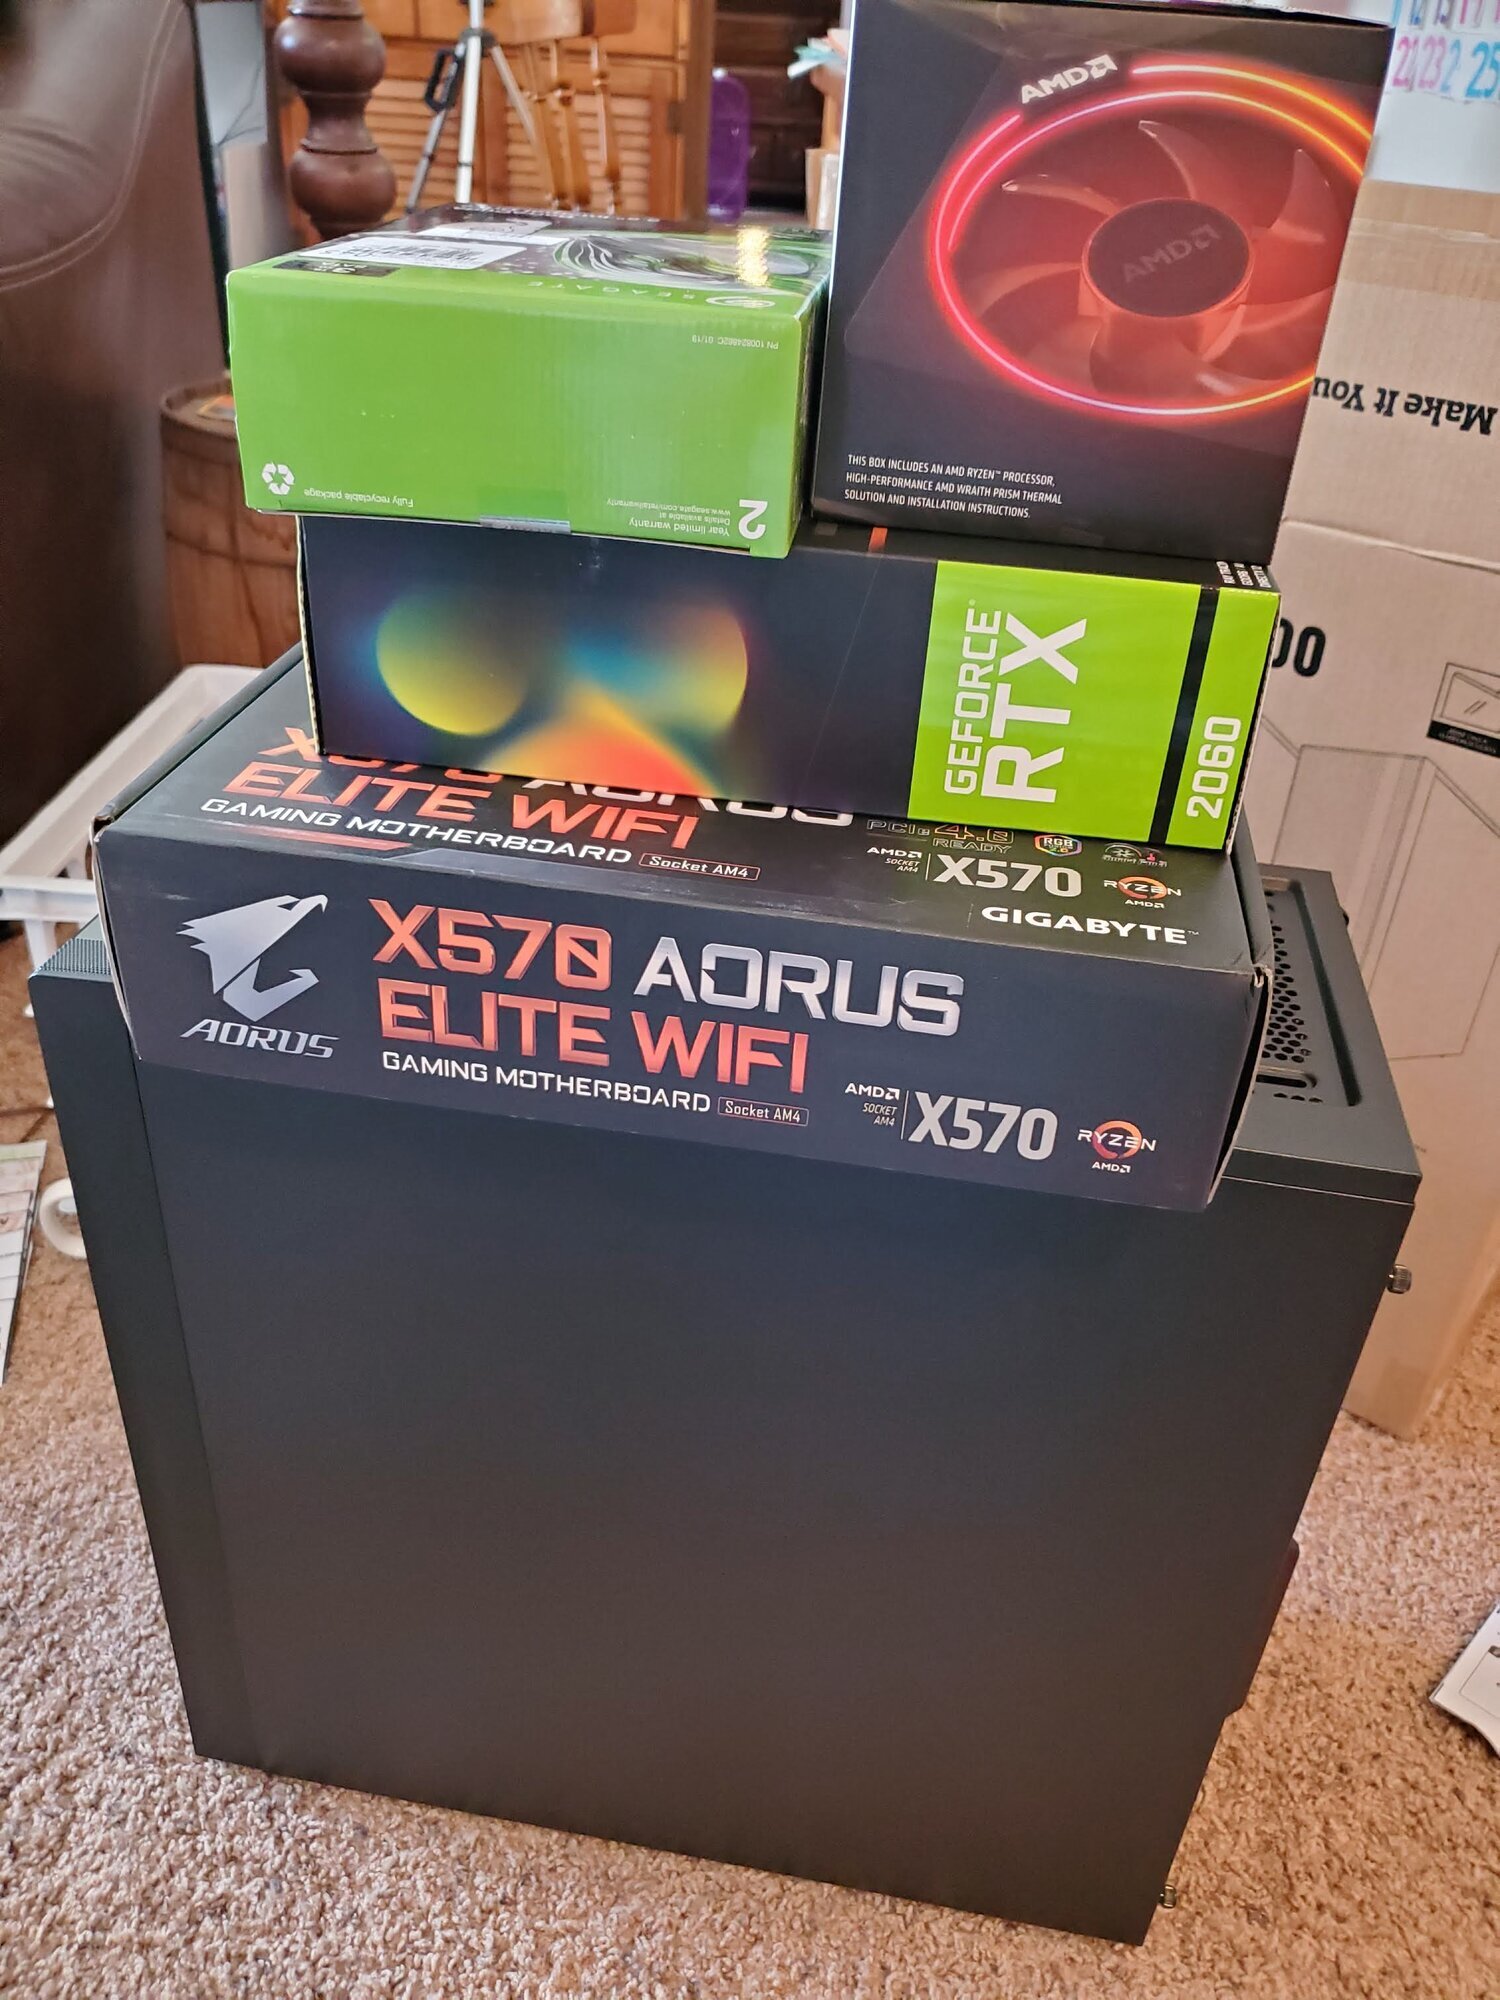
Seeing this pile grow over the course of a week was particularly exciting as it meant I was getting ever closer to my new PC
The most important thing I learned is that there are a ton of resources out there to help with building a PC from helping with picking the parts, to assembly, to drivers, to overclocking it is all out there on the world wide web waiting to be tapped. Even better was that I had a friend who has become incredibly knowledgeable over the years about researching builds and building his own as a hobby. His greatest contribution was helping me pick the parts that were going to become my new system. This part of the process can be the most daunting with the steepest learning curve. It takes a working understanding of compatible parts, how much power you will need, and which parts where brand and quality matter compared to parts you can get away with budget pieces that won’t really impact overall performance. On top of that, THERE ARE A LOT OF OPTIONS OUT THERE. I can easily see how someone who is interested in doing this could get easily overwhelmed and just buy a pre-build or have someone else do it for them. Then, there is estimating cost. Upon giving my friend my budget he already had a good idea of what I’d be looking at, and it didn’t take him long to put together something reasonable in that price range.
Here are the resources I found most useful in my first PC build journey.
Linus Tech Tips - It’s clear that this channel cares about providing quality information to its audience. They’re very forward with important information and honest with their opinions. LTT provided me with fantastic explanations of parts, processes, recommendations, and of course their amazing segues to their sponsors…
This channel also features a number of encouraging videos of people building their first PCs, includingLinus’s children at 3 years old. If a 3-year-old can successfully install a CPU, so can I.
Hardware Stress Testing - There are some really valuable pieces of software that specialize in putting your new build through the ropes to make sure it can handle what you plan on doing with it. It helps ensure that before you go play the latest and greatest game or render your super-duper Blender scene it isn’t going to overheat and crash on you. It gives you crucial information about what the limits of your machine are and whether or not you might need to get better cooling, or how to optimize the settings in your games. Some good ones include Furmark, Prime95, and even blender itself offers some really great benchmark scenes that you can use to compare your performance to other builds.
Hardware Monitoring - All that stress testing doesn’t do you much good if you can’t monitor what those tests are doing to your system. Hardware Monitoring is good, not only to check on a new build but if down the line it seems to slow down or act funny, it can help locate the issue. These are there to tell you information like speed cycles, voltage levels, and perhaps the most important, temperature. For my build, this is how I discovered that my RAM was not running at the speed it was rated for on the box, which was my transition into learning about overclocking, which I will get deeper into later. For hardware monitoring, I used HWMonitor, CPU-Z, and Ryzen Master with Ryzen Master being specific to AMD Ryzen systems.
Build Trackers - Keeping track of all of the various pieces, costs, compatibility, and comparing different builds can be tedious and easily lost. Luckily, there are a few websites that specialize in this. They can provide insight into pricing trends, compatibility, warnings of possible issues, and of course compile data together to easily see what you plan on buying. My friend used PC Part Picker to compile the list. This site also offers build guides and suggestions if you don’t have time to research parts yourself. I’ve also had Logical Increments highly recommended to me in the past which also offers some really great comparison and builds based on your needs and usage of a particular build.
People - This was by far the most valuable resource I had in my experience, and honestly this is true in lots of areas of my life. People saved me the most time and trouble over all of the other resources combined. From the employees at Micro Center to my friend who helped me create the list of parts, trusting their knowledge over my own and being willing to listen and learn was definitely the right call.
Sometimes the best way to progress is to just shut up and listen.

Me trying to learn this all by myself.
I also learned a ton of little things, little but still important. For one, PC temperatures are universally discussed in Celsius.
I also learned what an M.2 slot is and how fast and valuable they can be when it comes to data transfer and read speeds but only if they are NVMe. Apparently not every M.2 connections are created equal and it’s important to look at exactly what is listed on the motherboard before you buy and have expectations broken.
There is a standard rated speed for RAM and you may have to activate an XMP profile within your BIOS in order to tap into the full potential of what you have installed. However, in my case, the XMP didn’t work correctly because while my RAM is rated for 3600 MHz my motherboard is not. When I activated the XMP it automatically rated the RAM back to the standard because it registered that it was beyond the capabilities of the motherboard. This required me to use a few different pieces of software to determine what the actual speed was. Using that information I was able to go in and manually overclock my RAM. This involved going into the BIOS and setting the RAM to the correct voltage. I used a @Bios and DRAM Calculator software to determine what those values were. I was also able to set some light overclocking and performance profiles using RYZEN Master.
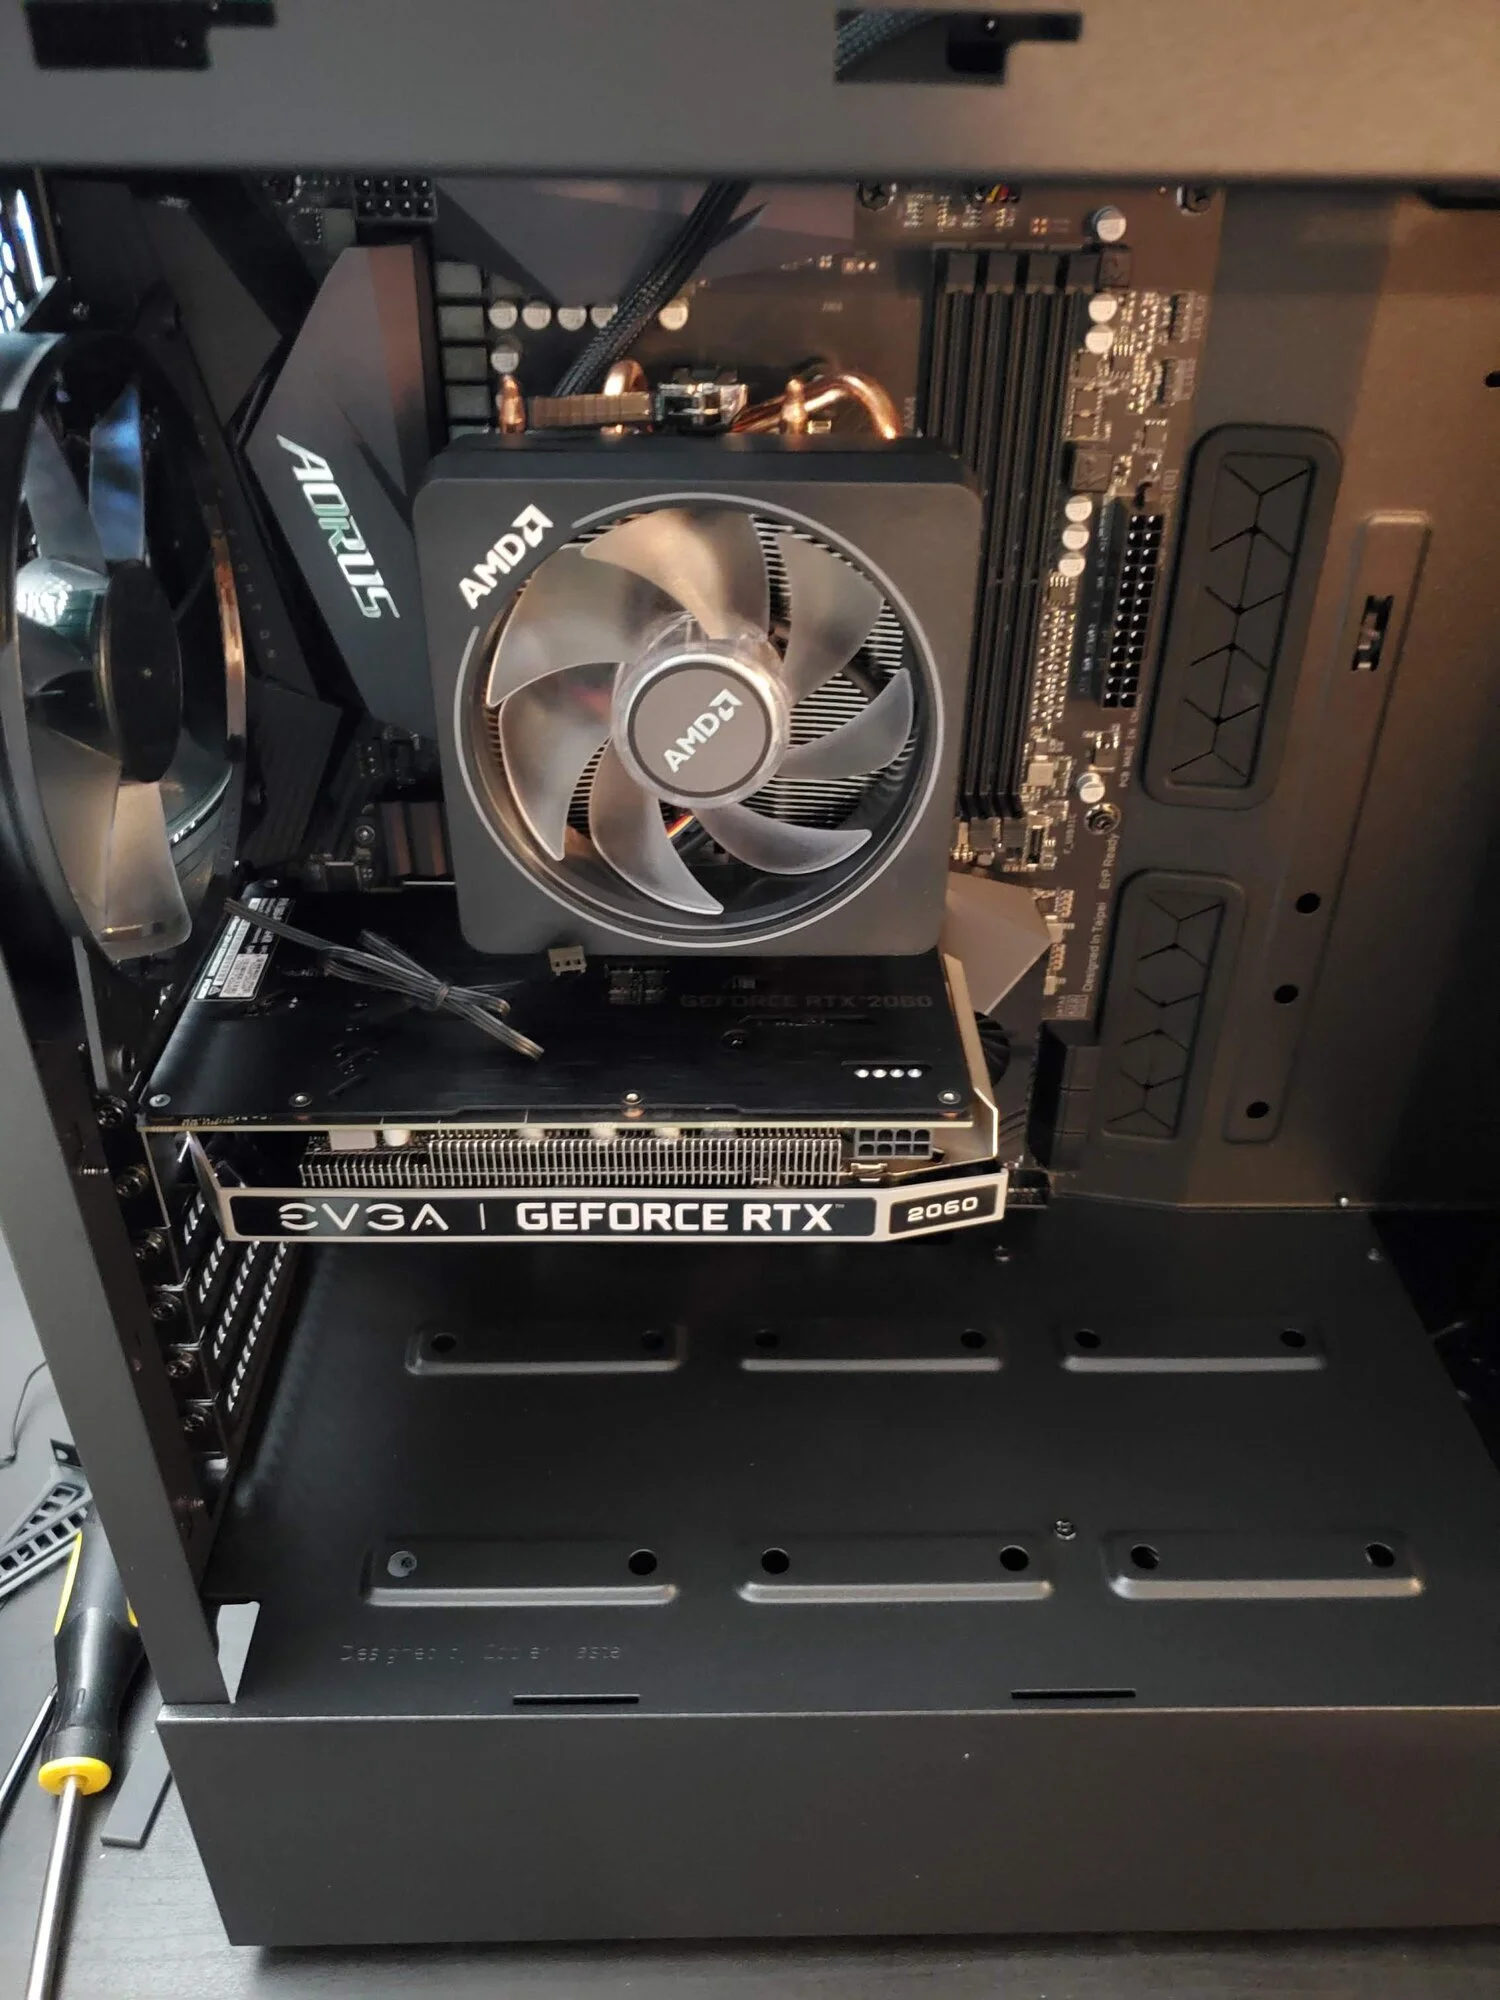
I got to this point and realized I needed to take the whole thing out again in order to finish it.
I learned that you should assemble most of your build BEFORE installing the motherboard into the case. This mostly has to do with access. Working inside the case severely limits the ability to access and install things to certain parts of the board. I made this mistake and ended up needing to remove the motherboard from the case to finish the assembly. Also, the box the Motherboard comes in can act as a really convenient static-proof build tray and a place to hold hardware.
Along with my new PC, I decided to venture into 4K and purchased a nice new monitor to go along with all this new power I had. As someone who does design, animation, and video having a nice screen to do that work on is pretty important. While the screen I got isn’t necessarily going to impress someone who wants to do a ton of gaming, with its limited 60hz refresh rate it does look fantastic and offers so much more real estate, color depth, and accuracy. I also primarily play single-player games or casual multiplayer with friends so I’m not quite as concerned with getting that 144hz at 150fps.
With the new monitor, I learned that as of right now HDR has no real standard of quality. If the screen can technically receive an HDR signal they can slap it as a selling point on the box. Just because your brand new 4K “HDR” monitor can receive the signal it doesn’t mean you will get the desired results. Turning on HDR resulted in super blown out areas and led me to think that A: I don’t like HDR, B: These are some terrible cinematographers with bad white balance (Anything that had the sun shining on it was just straight white), or C: Something was wrong with the HDR.
It was C.
What I discovered is that HDR is reliant on the brightness capabilities of the screen itself. If your screen is rated too low, anything that the HDR requires above that brightness level ends up displaying as white. Rewatching the same videos again with HDR off revealed that those areas of white did, in fact, have lots of detail and looked splendid in straight 4k. Also, HDR scenes indoors also looked spectacular, but not worth the loss in quality in outdoor daytime scenes. It’s recommended that a brightness value of at least 500 nits (brightness scale measurement) be available on a screen to start getting satisfying HDR results, but you likely won’t be truly blown away until hitting almost 1000 nits.

While the HDR would have been nice, the bigger screen and higher resolution are significant upgrades!
It’s also important to look at the dates of articles and guides you read. In some of my research, it would talk about a problem that would make me concerned about something only to realize that the article was 8 years old and that, in time, the issue had been fixed. Technology is constantly changing and making sure you are reading more recent articles on a topic helps ensure that you are getting actually relevant information related to your build. I found that 99% of the articles that had been written in the last 2 years were reliable. Longer than that and the results started to vary.
The first time I hit the power button my heart was racing. What if it explodes? What if it doesn’t work? What if I broke something or did it wrong? The first boot up I didn’t get a video signal out, I moved one stick of RAM over one slot and tried it again and it worked! From watching LTT it appears that jolt of fear of first power up never quite goes away no matter how many times you’ve done it before. That feeling is normal, so don’t beat yourself up about it.
By now you might be curious about what is under the hood of my new PC. Keep in mind that this is an atypical build. My needs as an editor and animator are different from someone looking for a gaming machine. So while certain parts may seem like overkill and others may seem dialed back, it does have some future-proofing with the expectations of upgrades in the future. Let me introduce you to “The Arc Reactor”.
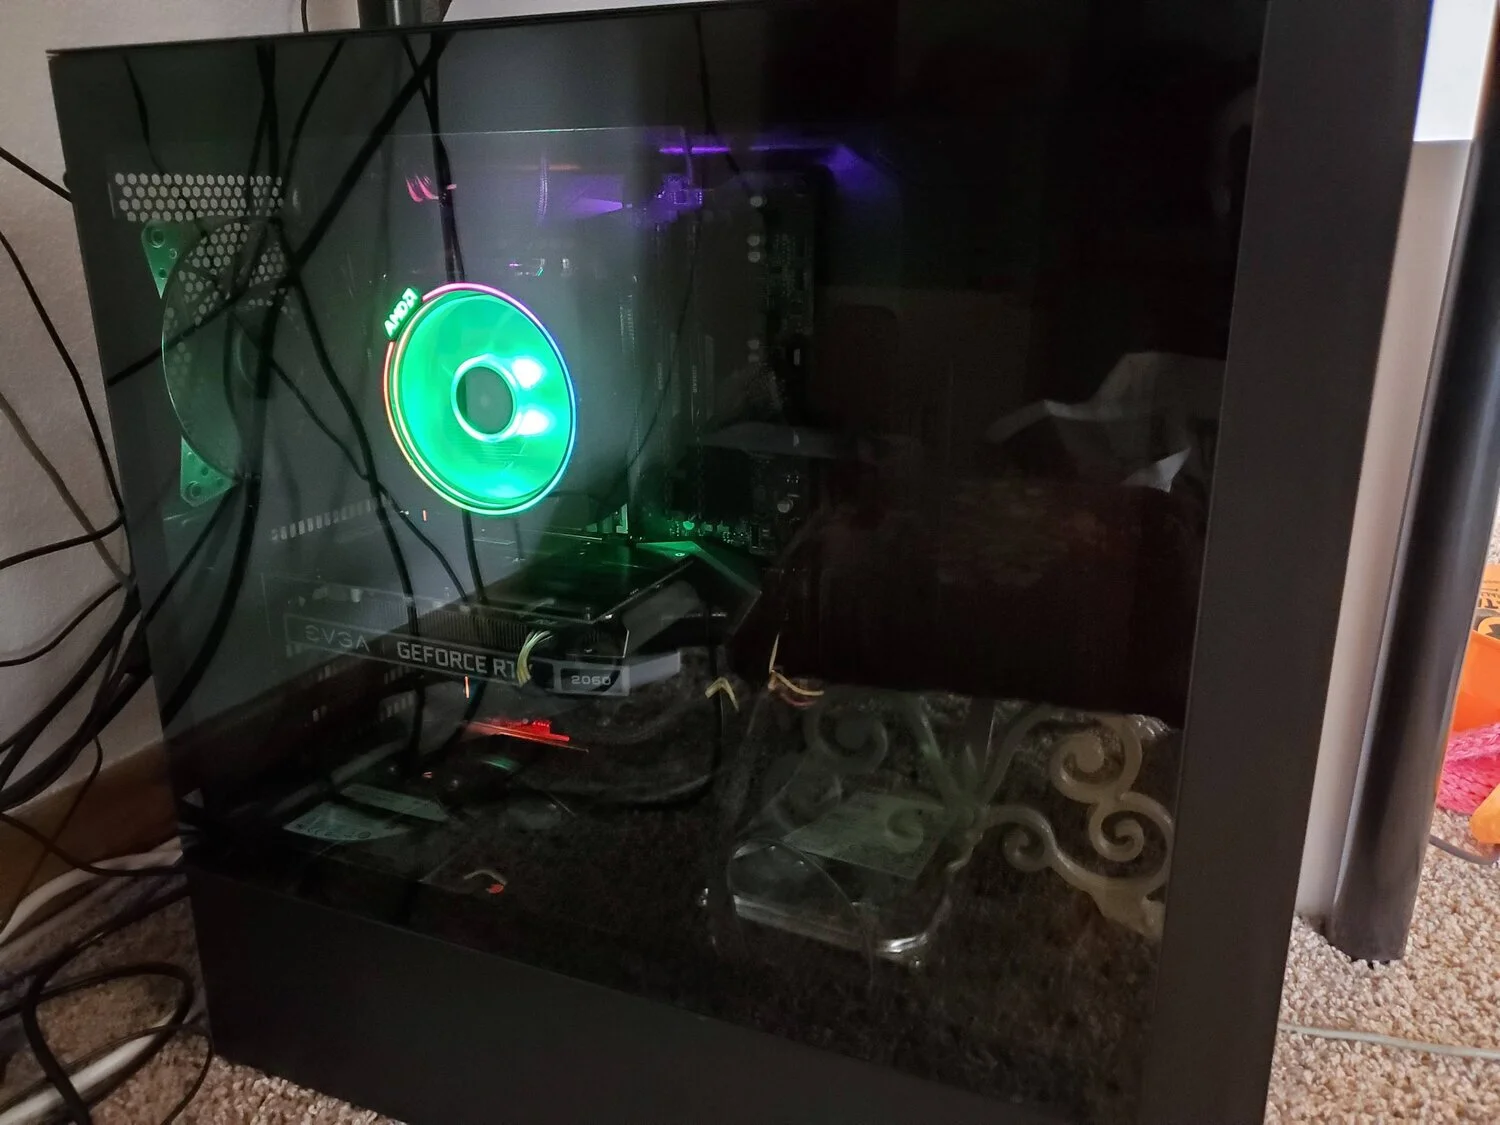
The Arc Reactor, in all its glory.
AMD Ryzen 7 3800
EVGA RTX 2060 KO*
64GB Corsair Vengence LPX DDR4-3600 (2x32)**
Gigabyte X570 AORUS Elite WiFi ATX AM4 Motherboard
Crucial P1 500 GB M.2-2280 NVME SSD
Seagate Barracuda Compute 3 TB 3.5” 5400RPM HDD
Thermaltake Toughpower GX1 RGB 600W
Cooler master masterBox NR600 (w/o ODD) ATX Mid Tower Case
Monitor: viewsonic vx2776 4k mhd
*The KO indicates that this card is a cut-down RTX 2080. For all intents and purposes is exactly an RTX 2060 and users discovered up to a 45% increase in performance when it came to rendering in Blender and After Effects, which makes it a perfect option for me. This was a fact discovered after the card was released and was unknown to NVIDIA at the time but since it has been properly tested and confirmed by NVIDIA and other sources.
**This is probably the biggest difference in my build compared to most gaming rigs. Most video games are not going to require more than 16GB of RAM. However, a complex Blender scene or After Effects project can easily get there. In fact, within the first week, I rendered a project that hit 45GB of my 64 available which explains why the project crashed during rendering on my old rig that had 36GB of RAM.
This rig is aptly named due to the single RGB lit fan on the CPU cooler, reminding me of Iron Man’s chest piece. I went mostly without RGB lighting to cut costs, but the stock fan of my CPU had it and I’m happy it did. The result is a fairly clean looking build, and the tempered glass panel adds a nice level of “I made this. LOOK AT IT!.” The lack of a space for an optical drive for discs, while limiting me in some ways, does provide an uncluttered and sleek looking front.
The total cost of my build was roughly $1550 USD along with the addition of a $350 4K monitor. A couple of things were on sale, and if done over time a patient buyer could have dropped it down to about $1300 USD.
I’m very proud of my build and I hope that sharing my experience encourages you to build a PC for yourself.


Video games have been demonized since their inception but several studies suggest that games can be actively helpful in many applications. Juno explores if video games can actually be good for the mind.